Can’t wait to upload custom stickers to your server and share them with your friends? This guide will walk you through the process of uploading and managing custom stickers on Discord.
In this article:
- Server Boosting and Stickers
- Granting and Removing Sticker Permissions
- Uploading Custom Stickers
- Naming Your Stickers
- Choosing Related Unicode Emojis
- Adding Alt Text (for accessibility)
- Tips for Writing Good Descriptions
- Editing and Deleting Stickers
- Frequently Asked Questions
Server Boosting and Stickers
By default, all servers get 5 custom sticker slots for free. You can unlock more slots by boosting your server to Levels 1, 2, or 3.
- Default: 5 sticker slots
- Level 1: +10 slots (15 total)
- Level 2: +15 slots (30 total)
- Level 3: +30 slots (60 total)
Granting and Removing Sticker Permissions
Note: Permissions are currently in testing, so changes here might not be visible to all users.
As a server owner, you can control who can add, remove, and edit stickers by enabling or disabling the “Create Expressions” permission.
- To allow a role to add custom stickers, enable the “Create Expressions” permission for that role.
- To give specific server admins or members the ability to edit or delete stickers, enable the “Manage Emojis” permission.
How to manage sticker permissions:
- Open your Server Settings by clicking the dropdown menu next to your server name.
- Go to the Roles tab and select the role you want to manage.
- In the Permissions tab, find “Create Expressions” and “Manage Emojis” under “General Server Permissions”.
Note: Managing custom stickers is currently only available on desktop. iOS or Android users will need to use the desktop or browser app to edit or delete stickers.
Uploading Custom Stickers
If you’re a server owner or have the “Create Expressions” permission, you can add custom stickers to your server.
- Open Server Settings and select the Emojis tab.
- Click the “Upload Emoji” button.
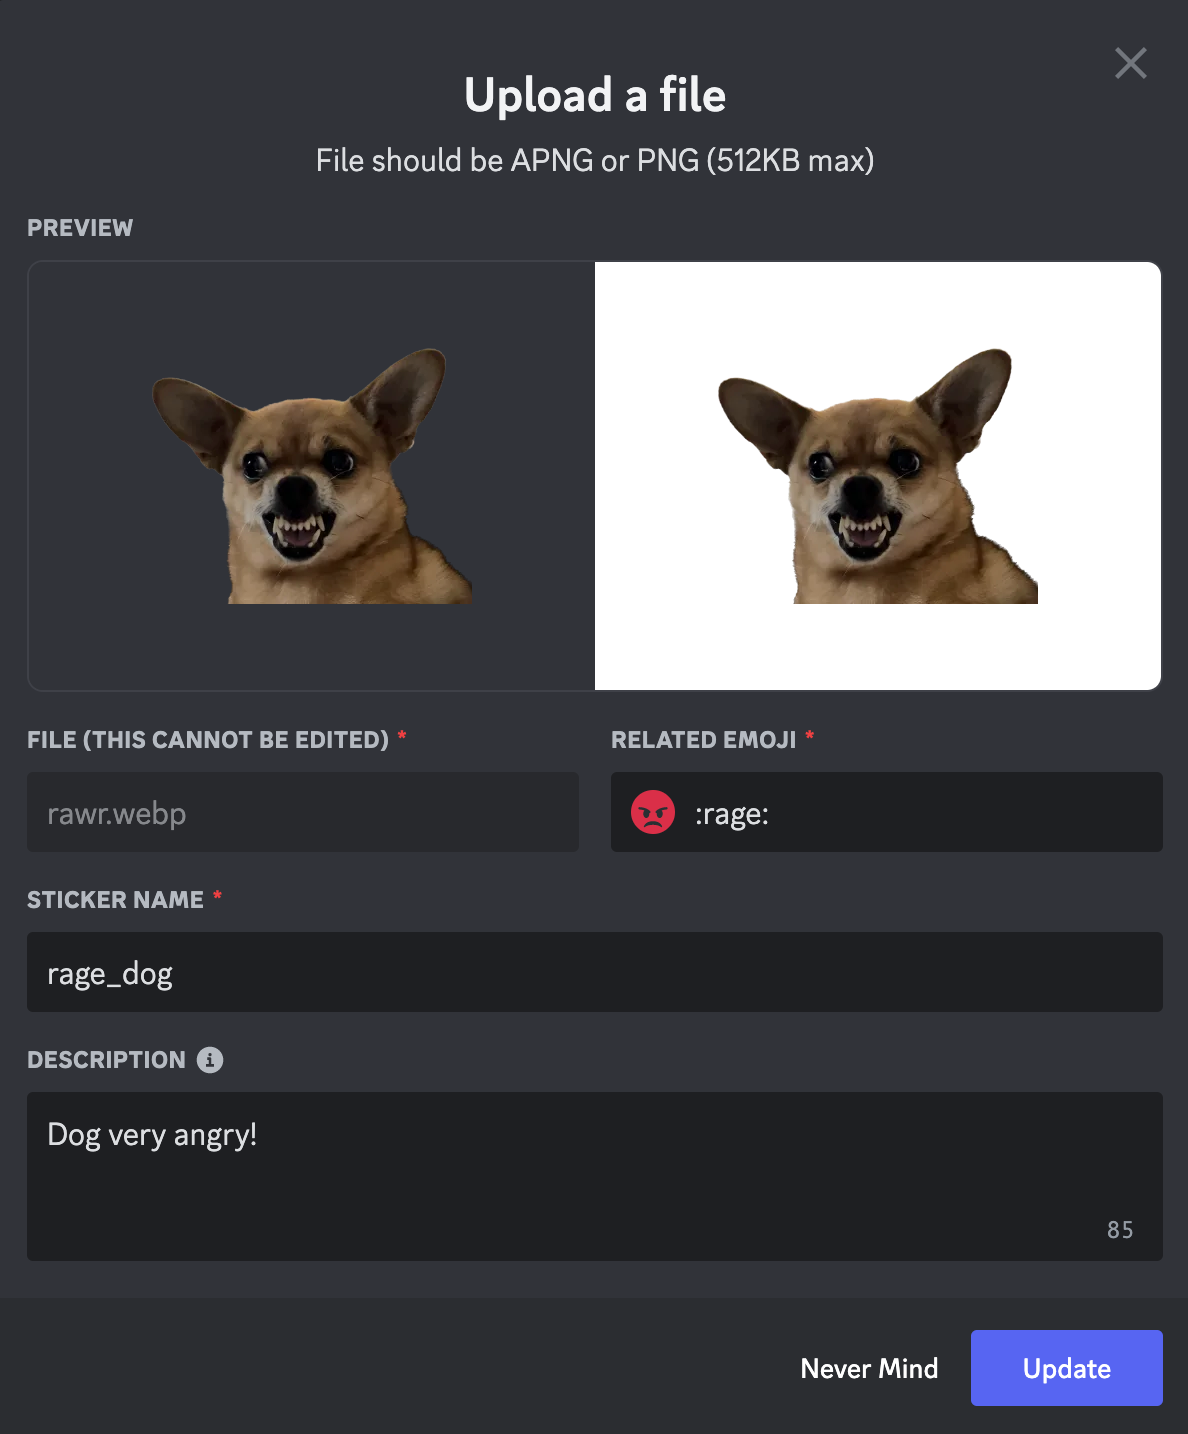
- Select a file from your computer. You’ll be asked to name the sticker and add a related emoji. Adding a short description is highly recommended to help users with screen readers understand the image content.
- Click “Upload”!
For more details and tips on creating custom stickers, check out Discord’s guide for creators.
Naming Your Stickers
While there are no strict rules for naming, here are some things to consider:
- Make it memorable and easy to search for.
- If there’s text in the image, use that in the name.
- Consider the emotion it conveys, the character’s name, or the character’s emotion.
Example: grumpy-dog, angry-cat, surprised-pikachu
Choosing Related Unicode Emojis
Adding a related Unicode emoji to your custom sticker helps users find it easily in the sticker suggestions. This includes:
- Sticker suggestions on desktop and mobile.
- When typing the related Unicode emoji in chat (e.g.,
:smile:). - When browsing the sticker drawer.
Adding Alt Text (Optional but Recommended)
We strongly recommend adding a short, concise description (alt text) to each custom sticker. This allows people using screen readers to understand what your sticker looks like without actually seeing it.
A good description is a short, complete sentence that describes what the sticker is and what emotion it conveys.
- Good example:
A pink flower character with a gentle smile walks across the screen. - Bad example:
An animated flower emerges from a blue circle surrounded by a green sky and clouds.
Tips for Writing Good Descriptions
- Check your spelling, capitalization, spacing, and grammar.
- Describe the image literally and choose the most important features of the image. Ideas for what to describe:
- The arrangement of objects in the image
- Subjects (animals, people, etc.)
- Facial expressions (e.g., smile)
- Colors
- Clothing details
- Text within the image
- Obvious details (e.g., “a human has eyes and a nose”)
- Focus on minor details that aren’t central to the image
- Creative writing
- Emojis
Editing and Deleting Custom Stickers
- Edit: Hover over the sticker and click the pencil icon.
- Delete: Hover over the sticker and click the red ‘X’ icon.
Note: You can’t edit the sticker file itself once it’s uploaded. If you need to replace the sticker file, you’ll need to delete the sticker and upload the new file.
Frequently Asked Questions
Q: Who can use the custom stickers uploaded to my server?
A: Anyone who joins your server can use your custom stickers within your server. Users with Nitro can use your custom stickers anywhere on Discord (other servers, DMs, etc.).
Q: How do I prevent people from sending stickers in my server?
A: There’s no permission to completely disable sending stickers within a server. If you want to prevent your server members from sending custom stickers from other servers, you’ll need to disable the “Use External Emojis”1 permission for the @everyone role.
Q: What kind of content can I use for stickers?
A: As with all content used on Discord, you are responsible for ensuring that the content you use for custom stickers complies with our Terms of Service and Community Guidelines.
Q: Can I get a deleted sticker back?
A: No, once you delete a sticker, it’s gone forever.
Q: Can I upload multiple stickers at once?
A: Currently, you can’t upload multiple stickers at once. If you’d like to see this feature, you can submit a request on Discord’s feedback site: https://dis.gd/feedback
Q: What happens to my previously uploaded custom stickers if my server loses a boost level?
A: Don’t worry, your custom stickers are safe! If your server loses a boost level, you’ll just temporarily lose access to use custom stickers from that level until you reach that boost level again. You can see which custom stickers will become unusable after losing a boost level in Server Settings > Stickers.
Q: Can I delete stickers that are locked behind a boost level that I recently lost?
A: Yes, you can still delete stickers from locked levels by following the deletion instructions above.
File Format Questions
Q: What’s the difference between APNG and PNG files?
A: A PNG file is a static image file format that compresses images in a specific way to prevent image quality loss. An APNG file is the animated version of this file format.
Q: Why can’t I use other file formats for custom stickers?
A: We chose file formats that look great in the app, just as they did when you made the sticker.
Conclusion
Custom stickers are a great way to personalize your Discord server and add some fun for your community. By following the steps outlined in this guide, you can easily upload, manage, and use custom stickers. Remember to be mindful of Discord’s Terms of Service and Community Guidelines, get creative, and have fun expressing yourself with stickers!