The XSplit Streamkit Overlay is an extension for XSplit Broadcaster provided by Discord.
By displaying the status of voice and text chats on your stream screen, you can enhance the sense of unity with your viewers and create more engaging streams.
3 Steps of XSplit Streamkit Overlay
Setting up the XSplit Streamkit Overlay is completed in the following three steps:
- Installation and Authentication
- Customization
- Implementation in XSplit
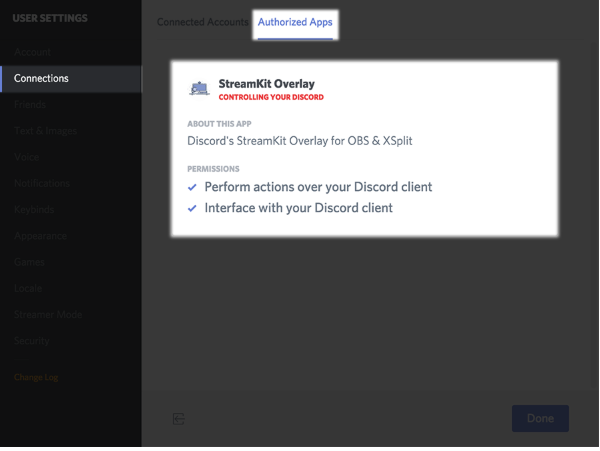
Step 1: Installation and Authentication
- Open the Overlay webpage and click “Install Overlay for XSplit”.
- Allow the Overlay to access the Discord client and control specific operations. The information allowed can be checked in User Settings > Connections > Authorized Apps.
- When the Overlay is connected to the client and accessing a portion of the client, a blue banner will appear at the top of the client window. The banner can be closed by clicking the X in the upper-right corner.
Step 2: Customization of the Overlay
- After authenticating the Overlay in the client, the customization page will appear.
- Below the XSplit logo, there are options to customize three widgets: Status, Chat, and Voice.
- Each widget allows customization of text color, size, shadow size, icon display/hide, and more. As you make adjustments, a live preview is displayed in the preview window.
Step 3: Implementation in XSplit
- Once the Overlay settings are complete, check the link in the installation panel.
- Installation is as simple as copying the link displayed in the installation panel and pasting it as a browser source in XSplit Broadcaster. Since each widget is issued a separate installation code, you will repeat the installation process for each widget you want to use.
How to Implement in XSplit
- Copy the installation link.
- In the “Add Source” menu, select “Other” and then select “Webpage URL”.
- Paste the installation link into the URL box and adjust the dimensions to your desired size.
- The Overlay is a custom resolution, so it needs to be manually adjusted in the XSplit client. Right-click on the source in the source menu and select the “HTML” tab. In the “View” window, enter the dimensions displayed immediately below the Streamkit link.
- The Overlay will appear in your stream preview.
Frequently Asked Questions
Q1. Is XSplit Streamkit Overlay free to use?
A1. Yes, the XSplit Streamkit Overlay is free to use.
Q2. What streaming platforms does XSplit Streamkit Overlay support?
A2. As long as it supports XSplit Broadcaster, it can be used on any streaming platform, such as Twitch, YouTube, and Niconico Live.
Q3. Can I customize the display of the XSplit Streamkit Overlay?
A3. Yes, you can customize the text color, size, font, shadow size, background color, icon display/hide, and more on the Overlay website.
Q4. Can I display multiple widgets with XSplit Streamkit Overlay?
A4. Yes, you can display all three widgets, Status, Chat, and Voice, simultaneously.
Q5. What should I do if the XSplit Streamkit Overlay does not display correctly?
A5. First, make sure that XSplit Broadcaster is the latest version. Also, check that you have allowed the Overlay access to the Discord client and that the browser source settings are correct. If the issue still persists, refer to the Discord Help Center or contact support.
Summary
By displaying the status of voice and text chats from Discord on your stream screen, the XSplit Streamkit Overlay allows you to increase the sense of unity with viewers and create more engaging streams.
Please use this article as a reference and leverage the XSplit Streamkit Overlay to power up your streams.